If you’re looking to migrate your website from cPanel to VestaCP, you’ve come to the right place. In this complete guide, we will walk you through the process of transferring your site seamlessly from cPanel to VestaCP. Whether you’re a beginner or an experienced webmaster, this step-by-step guide will help you make the transition smoothly and efficiently. So let’s dive in and learn how to migrate your site with ease.
Understanding the Basics of cPanel and VestaCP
Navigating the realm of web hosting control panels can be daunting for both novices and seasoned webmasters. However, to understand the need to switch from cPanel to VestaCP one needs to grasp what each of the two offers. cPanel is widely used and has everything a user could need to manage various tasks related to web hosting; however, it can be quite complex at times. Its interface, familiar to many, allows for intuitive site management but comes at a cost, both financial and in terms of resource usage.
On the other hand, VestaCP comes out as a stylish rival, which is an open-source control panel that is free to use. Operationally, it has a plain layout that ensures users can cope with the hosting duties without complications, as this enhances the firm’s effectiveness and utility. However, the lean nature of VestaCP means it might not have every feature available in cPanel by default, pushing users to adopt a more hands-on approach for specific functionalities.
Familiarising with these differences is crucial in a migration scenario as it forms the basis of coming up with a decision on the appropriateness of VestaCP for a given scenario as well as changes to expect in the process.
Pre-Migration Checklist for a Smooth Transition
Before diving into the migration process, assembling a thorough pre-migration checklist is crucial for a seamless transition from cPanel to VestaCP. This proactive step is your safeguard against potential hurdles, ensuring your website remains intact and operational throughout the move. Begin by systematically backing up all website components, including files, databases, and emails, to prevent any loss of data.
It’s equally important to review and document your current domain configurations and DNS settings, as this information will be vital for setting up your site on VestaCP. Additionally, taking the time to check for any software or application versions on your current hosting might save you from compatibility issues later on. Also, ensure that all your scripts, plugins, and third-party services are accounted for and compatible with VestaCP.
Lastly, verify the proper functioning of security features in your website including SSL certificates to realize if can be moved or changed to a new structure successfully. With such adherence to these steps in mind, you are creating a good formula for the error-free migration process that is paving the way for the successful integration with VestaCP.
Exporting Your Website Data from cPanel
To begin the migration process from cPanel to VestaCP, the initial step requires exporting all pertinent website data from cPanel. This crucial phase encompasses creating backups of your website files, databases, and email accounts. Leveraging cPanel’s built-in backup functionality enables a comprehensive export of your site’s vital components.
Utilize the Backup Wizard in cPanel to systematically compile and download your website’s data. It’s important to ensure each backup is complete and successfully saved locally or on a secure cloud storage service. Following the backup, you can employ either FTP (File Transfer Protocol) or SSH (Secure Shell) to securely transfer the exported files to your new VestaCP server.
This transfer is the initial stage of importing your website to the VestaCP environment, which creates an initial preparation for migration. Creatively undertaking this step is crucial in the management of your site to achieve more structure and utility in the new domain.
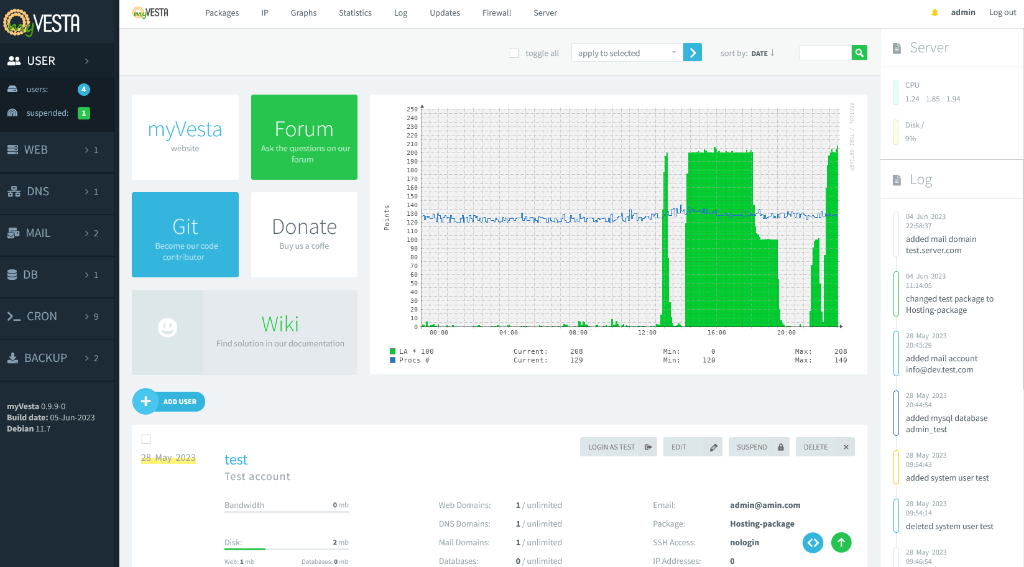
Setting Up Your VestaCP Environment
Embarking on the task of configuring your VestaCP environment forms a pivotal step in the migration journey from cPanel. This step primarily focuses on getting VestaCP up and running on your server. Initiate this phase by downloading the latest version of VestaCP from its official website, ensuring you’re working with the most updated and secure version. Installation is straightforward, typically involving a command line operation that can be executed following the detailed guidelines available on the VestaCP documentation.
Once installed, you’ll navigate through setting up domain details, creating essential user accounts, and establishing databases that your website will require to operate efficiently within VestaCP. It’s vital at this juncture to configure your domain settings accurately to mirror those previously set in cPanel, preserving the operational integrity of your website.
This includes pointing your domain to the new server’s IP address and adjusting any necessary DNS records to ensure continuity in your website’s accessibility. This step is very important and successful completion of this step will pave the way for the next phase of the process where you will start seeing your migrated website data in VestaCP.
Importing Your Website to VestaCP
The process of migration of your website data onto VestaCP entails several stages aimed at providing the most accurate copying of your files, databases, and e-mail accounts. Start by locating the backup files you previously exported from cPanel. These files serve as the cornerstone for migrating your website’s essential components to the new platform.
Utilizing VestaCP’s file manager or connecting via FTP, upload your website files to the appropriate directories. Next, it is time to recover your databases. As for the creation of the new database, you get the means to do it through the VestaCP panel and then transfer your SQL dump with the aid of such a tool as phpMyAdmin, for instance.
For email accounts, the process may vary slightly depending on the specifics of your setup but generally involves creating new email accounts in VestaCP and importing the mail data. It is imperative during this phase to meticulously check that all data has been correctly placed and is functioning within the new environment. It is not just moving data but rather, making your website run as a cohesive unit, in the new environment. If you are to rationalize these procedures, they will assist you in embarking on other important stages towards completing the migration of your website into an imported one.
Post-Migration Steps and Troubleshooting
After your website has been moved to VestaCP, there are several critical post-migration tasks to undertake to ensure everything operates smoothly. Begin by meticulously testing every facet of your website, including its functionality, loading times, and response to different user actions. It’s crucial to verify that all links are functional and lead to the correct pages to prevent any navigation issues for your visitors.
Additionally, adjusting your DNS records may be necessary to reflect the new hosting environment, thereby avoiding any accessibility problems. Security settings, particularly SSL certificates, should be re-evaluated and applied as needed to maintain site integrity and user trust.
Encountering minor issues during a migration is common; hence, troubleshooting plays a vital role in this phase. Check error logs for any signs of problems and address them promptly. If specific pages or functionalities are not working as expected, comparing the configurations between cPanel and VestaCP may reveal discrepancies requiring adjustment. It is also possible to gather information and potential solutions to frequently occurring migration issues within the forums of the VestaCP community. If treated with a lot of effort these steps help you have a tight and secure running of any website on the new platform.

Optimizing Your Website on VestaCP
With your site now successfully migrated to VestaCP, it’s an opportune time to focus on optimization strategies to enhance your website’s performance and bolster its security. Improve the usage of caching solutions that are specific to VestaCP or at least compatible with it, as it is known that page loading time is quite important for the users.
Incorporating your website’s code to look for optimization opportunities like minifcation of current CSS and Javascript files is also possible. Also, ensure you have a secure server by purchasing or updating SSL certificates, the most crucial aspect in matters concerning the protection of the data, and, therefore, the authenticity of your site to the users. At the same time, it is also important to highlight the fact that applying these optimization aspects also can improve the new and more effective system of VestaCP as well as contribute to difficulty-free and safe work with the site for the final user.
Conclusion and Additional Resources
Wrapping up this comprehensive guide, the transition from cPanel to VestaCP has been demystified, providing you with a clear pathway to accomplish the migration effectively. It’s crucial to approach this process methodically, leveraging the detailed steps provided, from preparing your pre-migration checklist to the optimization of your website on VestaCP.
It also helps to eliminate troubles associated with website transitioning while preparing you for proper management of your website in the new context. For those who want to explore more or in case of individual requirements, the official documentation of VestaCP is very helpful which explains all the values of this platform.
Furthermore, the community forums of VestaCP contain a vast amount of information and you can ask the existing users for help as well as share your experience with others or find out how to solve some migration issues. If you use these resources, it amplifies your knowledge and skills for achieving a strong base of your website on VestaCP. Tackle the activities associated with the process of migration with confidence bearing in mind that in case of any hindrances, you are not alone.